
Laravel Factories
When creating an application you’ll often want to add in dummy data for testing functionality, layouts etc. PHP has an excellent faker library to create all manner of fake/dummy data like email addresses, names, surnames etc. This faker library comes packaged with Laravel, ready to use.
A quick Laravel faker test.
We’ll do a quick faker test. Open up tinker and get a name. name will return a full name in the format “firstName lastName”.
In tinker, type: fake()->name();. You could also use firstName() or lastName().
$ php artisan tinker
Psy Shell v0.12.0 (PHP 8.2.16 — cli) by Justin Hileman
> fake()->name();
= "Dr. Declan Frami"
Let’s test this in a browser too. Open your routes/web.php file and add a /name route, like this:
Route::get("/name", function () {

    return fake()->name();

});
Now start the server if you haven’t already (php artisan serve) and navigate to http://127.0.0.1:8000/name (change the host and port number to whatever artisan tells you, but this is typical):
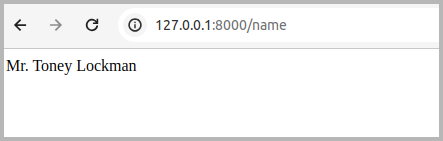
Great, so we know that faker works and we’re going to use it now in our factories.
Setting up our Laravel Project
In this dummy project we’re going to mock a blog type setup. We’ll only have three models, Post, Comment and User.
A Post belongs to a User and a Comment belongs to a Post and a User.
The User model already exists (assuming a default installation). To create the Post and Comment modals we’ll use the artisan make:model commands from the terminal. We’ll add the -m flag so that it also create the migration files for the database tables:
$ php artisan make:model Post -m

   INFO  Model [app/Models/Post.php] created successfully.

   INFO  Migration [database/migrations/2024_03_10_132016_create_posts_table.php] created successfully.

php artisan make:model Comment -m
    INFO  Model [app/Models/Comment.php] created successfully.

    INFO  Migration [database/migrations/2024_03_10_132016_create_comments_table.php] created successfully.
We should now see a Post.php and Comment.php class in our app/Models directory.
$ ls app/Models/
  Comment.php  Post.php  User.php
Model Relationships
Next, we’ll set up the relationships between these models. The Post model belongsTo the User model and hasMany Comment models. The Comment model belongsTo a Post model as well as belongsTo a User model.
// app/Models/User.php
<?php

namespace App\Models;

use Illuminate\Database\Eloquent\Factories\HasFactory;
use Illuminate\Foundation\Auth\User as Authenticatable;

class User extends Authenticatable
{
    use HasFactory;

    public function post()
    {
        return $this->hasMany(Post::class);
    }

    public function comment()
    {
        return $this->hasMany(Comment::class);
    }

}
// app/Models/Post.php
<?php
namespace App\Models;
use Illuminate\Database\Eloquent\Factories\HasFactory;
use Illuminate\Database\Eloquent\Model;
class Post extends Model
{
use HasFactory;
public function user()
{
return $this->belongsTo(User::class);
}
public function comment()
{
return $this->hasMany(Comment::class);
}
}
// app/Models/Comment.php
<?php

namespace App\Models;

use Illuminate\Database\Eloquent\Factories\HasFactory;
use Illuminate\Database\Eloquent\Model;

class Comment extends Model
{
    use HasFactory;


    public function post()
    {
        return $this->belongsTo(Post::class);
    }


    public function user()
    {
        return $this->belongsTo(User::class);
    }

}
Next we need to add the columns to our migration files.
HasFactory Trait
Our models need to use the HasFactory trait in order to work as expected. If you’re sticking to the conventions of where models and factories are stored and their naming conventions then using this HasFactory trait is enough for Laravel to associate the correct factory to the model. See the bold code above for where to place the HasFactory trait code, noting also that the trait must be included in the code.
Database Migration
For this highly simplistic app our Post model will only contain a foreignId column named user_id for the User model relationship and a text column named title for the post title, as well as a enum column named status. This is aside from the columns added in by Laravel like id and the date columns.
Our Comment model will have a foreignId column named user_id for the User model relationship, another foreignId column named post_id for the Post model relationship and a string column named comment for the actual comment. This is aside from the columns added in by Laravel like id and the date columns.
// database/migrations/2024_03_08_170357_create_posts_table.php
<?php

use Illuminate\Database\Migrations\Migration;
use Illuminate\Database\Schema\Blueprint;
use Illuminate\Support\Facades\Schema;

return new class extends Migration
{
    /**
     * Run the migrations.
     */
    public function up(): void
    {
        Schema::create('posts', function (Blueprint $table) {
            $table->id();

            $table->foreignId("user_id");
            $table->text("title");
            $table->enum("status", [
               "archived",
               "published",
               "draft"
            ]);
            $table->timestamps();
        });
    }

    /**
     * Reverse the migrations.
     */
    public function down(): void
    {
        Schema::dropIfExists('posts');
    }
};
// database/migrations/2024_03_08_170425_create_comments_table.php
<?php
use Illuminate\Database\Migrations\Migration;
use Illuminate\Database\Schema\Blueprint;
use Illuminate\Support\Facades\Schema;
return new class extends Migration
{
/**
* Run the migrations.
*/
public function up(): void
{
Schema::create('comments', function (Blueprint $table) {
$table->id();
$table->foreignId("user_id");
$table->foreignId("post_id");
$table->string("comment");
$table->timestamps();
});
}
/**
* Reverse the migrations.
*/
public function down(): void
{
Schema::dropIfExists('comments');
}
};And finally we run our migrations using artisan:
$ php artisan migrate

   INFO  Running migrations.

  2024_03_08_170357_create_posts_table ....... 6ms DONE
  2024_03_08_170425_create_comments_table ....... 6ms DONE
Making Our Factories
Great, at this stage we have our three models but no data. This is where the real meat of this blog comes in. Let’s get on to our factories, one step at a time.
As with most things in Laravel there are conventions around naming factory classes. Generally you’ll name your factory {Model}Factory.php, eg, for the User model you’ll see a UserFactory.php class in the database/factories directory.
$ ls database/factories/
   UserFactory.php
We’ll be creating a PostFactory and a CommentFactory. We’ll use php artisan make:factory to get these done:
$ php artisan make:factory PostFactory

   INFO  Factory [database/factories/PostFactory.php] created successfully.

$ php artisan make:factory CommentFactory

   INFO  Factory [database/factories/CommentFactory.php] created successfully.
Coding Our Factories
PostFactory
As you can see from the posts migration file then only two fields we need to fill are the user_id and title fields. The id and date stamps are automatically created for us if we omit them.
A factory class has a definition function in which we’ll place our code to create the models. This should already be scaffolded for you, all you have to do is add the code. Here is our code for the PostFactory:
<?php

namespace Database\Factories;

use Illuminate\Database\Eloquent\Factories\Factory;

use App\Models\User;

/**
 * @extends \Illuminate\Database\Eloquent\Factories\Factory<\App\Models\Post>
 */
class PostFactory extends Factory
{
    /**
     * Define the model's default state.
     *
     * @return array<string, mixed>
     */
    public function definition(): array
    {

        $status = [
            "archived",
            "published",
            "draft"
        ];

        return [
            "user_id"   => User::factory(),
            "title"     => Fake()->text(30),
            "status"    => $status[mt_rand(0, 2)],
        ];
    }
}
This example highlights an important point. We don’t need to hard-code values and we don’t need to use Fake() for all values. We could use another model factory as we do for our user_id field. When we run the PostFactory it will first create a new user using the UserFactory and use its id for the user_id field!
CommentFactory
Our CommentFactory is responsible for seeding our comments table. As we know the Comment model has a user_id field, a post_id field and a comment field. A comment belongs to both a user and a post. Our CommentFactory code looks like this:
<?php

namespace Database\Factories;

use Illuminate\Database\Eloquent\Factories\Factory;


use App\Models\User;
use App\Models\Post;


/**
 * @extends \Illuminate\Database\Eloquent\Factories\Factory<\App\Models\Comment>
 */
class CommentFactory extends Factory
{
    /**
     * Define the model's default state.
     *
     * @return array<string, mixed>
     */
    public function definition(): array
    {
        return [
            "user_id"   => User::factory(),
            "post_id"   => Post::factory(),
            "comment"   => Fake()->text()
        ];
    }
}
Calling Our Factories
Its simple to call our factories. We’ll be doing this in tinker. All you need to do is call the factory method on the model class. So, for instance, to create a new Post we’ll call \App\Models\Post::factory()->create();
$ php artisan tinker
Psy Shell v0.12.0 (PHP 8.2.16 — cli) by Justin Hileman
> \App\Models\Post::factory()->create();
= App\Models\Post {#5082
    user_id: 142,
    title: "Distinctio esse qui sed sit.",
    status: "published",
    updated_at: "2024-03-13 18:09:30",
    created_at: "2024-03-13 18:09:30",
    id: 73,
  }
In the code above we called the factory method on the Post model and we can see that a new Post model was successfully created with our fake title. We can also see that a new User has been created with id 142. If we ran this command again it would create another post with another new user.
Now, lets create a new comment using the CommentFactory, but this time I’m going to run the tinker command twice:
> \App\Models\Comment::factory()->create();
= App\Models\Comment {#6157
    user_id: 143,
    post_id: 86,
    comment: "Voluptatem voluptatem laborum et excepturi laborum eius. Quia eum quam eos fugit doloremque.",
    updated_at: "2024-03-14 03:26:02",`
    created_at: "2024-03-14 03:26:02",
    id: 28,
  }

> \App\Models\Comment::factory()->create();
= App\Models\Comment {#4995
    user_id: 145,
    post_id: 87,
    comment: "Dolores rem ab vel. Praesentium ut vel cupiditate omnis molestiae est. Ut praesentium nulla reiciendis magnam tenetur eius.",
    updated_at: "2024-03-14 03:26:15",
    created_at: "2024-03-14 03:26:15",
    id: 29,
  }
The reason I wanted to run the comment factory twice was to highlight the user creation. In our CommentFactory we create a new User using the User::factory() method for the user_id field and we create a new Post using the Post::factory() method for the post_id field.
In our previous example when we created a new Post it showed a new user with id 142 was created. When we ran our first Comment factory it showed a user id of 143. That makes sense. But when we created our second Comment factory it showed a user id of 145. So what happened to user with id 144?
Well, remember that our CommentFactory creates a User using the UserFactory. It also creates a Post using the PostFactory. But the PostFactory itself creates a user using the UserFactory, so we get two new users for each comment.
This might be what you want, after all, we would expect most comments to be different users than the post author. But what if you wanted the comment user and post user to be the same?
Recycle Method
Laravel has a handy recycle method you can use when creating models using a factory. It lets you ‘recycle’ a model throughout your factory chain. We can now update our factory calls from above like this:
\App\Models\Comment::factory()->recycle(User::factory()->create())->create();If you run the above code your new comment and post will have the same user created and assigned. This also holds true for creating multiple comments using the count() method chained onto the factory method, like this:
\App\Models\Comment::factory()->count(2)->recycle(User::factory()->create())->create();
// You could also just pass a count to the factory method, like this:
// \App\Models\Comment::factory(2)->recycle(User::factory()->create())->create();
We’ll now get back two comments, each using the same user for both comments and posts:
= Illuminate\Database\Eloquent\Collection {#5013
    all: [
      App\Models\Comment {#6330
        user_id: 32,
        post_id: 39,
        comment: "Vel ut sed ullam iure. Sapiente voluptatem voluptatem ea et odio officiis saepe. Et non asperiores earum nostrum sequi ducimus.",
        updated_at: "2024-03-18 10:23:43",
        created_at: "2024-03-18 10:23:43",
        id: 39,
      },
      App\Models\Comment {#6284
        user_id: 32,
        post_id: 40,
        comment: "Beatae consectetur eum et quisquam. Officia asperiores assumenda nemo architecto consectetur dolorum enim ea. Nihil voluptatem vel officiis quia eos qui. Eveniet explicabo sapiente ipsa.",
        updated_at: "2024-03-18 10:23:43",
        created_at: "2024-03-18 10:23:43",
        id: 40,
      },
    ],
  }
Overriding Factory Properties
When calling make() or create() on the model’s factory you can pass in an associative array to override properties of the model. The key of the array should be the database key of the model’s field you’re overriding.
For instance, in our code above we created a comment by calling the comment factory. This created a comment with a random string from Faker. But what if we wanted to write a unit test to test that comments are correctly created? In these types of cases it would be very handy if we could create comments using exact text that we could test against. Fortunately Laravel makes that easy.
To override a value when calling the factory method, pass the create() or make() function an associative array with the key being the field you want to change and the value being the value it should set. For instance, in our Comment Factory we want to use the comment ‘Factories are fun and useful’. To do this pass the array [‘comment’ => ‘Factories are fun and useful’ to the create method:
\App\Models\Comment::factory()->create(['comment' => 'Factories are fun and useful']);
= App\Models\Comment {#4995
    user_id: 145,
    post_id: 87,
    comment: "Factories are fun and useful",
    updated_at: "2024-03-14 03:26:15",
    created_at: "2024-03-14 03:26:15",
    id: 29,
  }
We could override multiple fields by adding more of them to the array, eg:
[
    'comment' => 'Factories are fun and useful',
    'post_id' => 134
]
Sequences
You can also pass in a Sequence of arrays to fill your fields with specific data. For instance, if we take our comment factory above but this time we want to create 3 comments with specific data, we can do so like this:
use Illuminate\Database\Eloquent\Factories\Sequence;
\App\Models\Comment::factory()
    ->count(4)
    ->state(new Sequence(
        ['comment' => 'This is comment one'],
        ['comment' => 'This is comment two'],
        ['comment' => 'This is comment one'],
    ))
    ->create();

= all[
  App\Models\Comment {#4995
    user_id: 145,
    post_id: 87,
    comment: "This is comment one",
    updated_at: "2024-03-14 03:26:15",
    created_at: "2024-03-14 03:26:15",
    id: 29,
  },App\Models\Comment {#4995
    user_id: 145,
    post_id: 87,
    comment: "This is comment two",
    updated_at: "2024-03-14 03:26:15",
    created_at: "2024-03-14 03:26:15",
    id: 29,
  },App\Models\Comment {#4995
    user_id: 145,
    post_id: 87,
    comment: "This is comment three",
    updated_at: "2024-03-14 03:26:15",
    created_at: "2024-03-14 03:26:15",
    id: 29,
  },App\Models\Comment {#4995
    user_id: 145,
    post_id: 87,
    comment: "This is comment one",
    updated_at: "2024-03-14 03:26:15",
    created_at: "2024-03-14 03:26:15",
    id: 29,
  },
In this example you’ll see that we have a new Sequence which contains an array with three items. When you create our factory we call count() with four to create four comments, but we only had three items in our sequence. The sequence gets to the end, then loops around again so you don’t have to have the same number of sequence items as models you’re creating.
In this example its not that useful. But if you were seeding a database to test your application and you wanted a mix of posts in different status (eg, published, archived, deleted, spam, draft, etc) you could easily do that using Sequences.
Has and For
Right near the top of this post we set up our model relationships (belongTo, HasMany in this example). We can use these relationships when calling out factories.
Has method
Remember that a Post Model hasMany Comment models. We can use that in our factory like this:
\App\Models\Post::factory()->has(\App\Models\Comment::factory(2))->create();
App\Models\Post {#6195
    user_id: 58,
    title: "Voluptate ut ea et et ab.",
    status: "published",
    updated_at: "2024-03-26 13:58:46",
    created_at: "2024-03-26 13:58:46",
    id: 52,
  }
If you check the database now you’ll see that the post factory also has 2 comments added to it (because we passed 2 into the comment factory – we could also have said …factory()->count(2)…).
For method
Conversely to the has method the for method is to create a model which belongsTo a “parent” model. The factory will create both, as with the has method:
\App\Models\Comment::factory()->count(2)->for(\App\Models\Post::factory())->create();
= Illuminate\Database\Eloquent\Collection {#5012
    all: [
      App\Models\Comment {#6169
        user_id: 61,
        post_id: 53,
        comment: "Dolor ut ipsam nisi aut vitae eveniet minus. Corporis et nisi animi consectetur ut et quisquam qui. Possimus voluptas eos quo. Ratione optio cumque quisquam quas aperiam.",
        updated_at: "2024-03-26 14:13:14",
        created_at: "2024-03-26 14:13:14",
        id: 57,
      },
      App\Models\Comment {#6288
        user_id: 63,
        post_id: 53,
        comment: "Soluta et voluptate nemo. Eum aut accusamus quod debitis reprehenderit voluptatem. Qui eligendi repudiandae consequatur illo. Autem sequi similique commodi aut et eum.",
        updated_at: "2024-03-26 14:13:14",
        created_at: "2024-03-26 14:13:14",
        id: 58,
      },
    ],
  }
In this example we create 2 Comments. We also want to create the Post which the comments belong to so we use the for method and pass in the Post model factory.
Factory States
Using factory states we can modify fields in our factory using state functions. This is basically a function you write in your factory which has access to an array of attributes of the factory which is passed into an anonymous function. The anonymous function returns and array of fields to modify. An example should clear this up.
In our Post factory, we randomly assign a status of either archived, published or draft. But we may want to assign a specific status, not a random one. We’ve already seen that we can override fields by passing in an array to the make() or create functions, but we can also write state functions, like this:
    public function published()
    {
        return $this->state(function (Array $attributes) {
            return [
                "status" => "published",
            ];
        });
    }

    public function draft()
    {
        return $this->state(function (Array $attributes) {
            return [
                "status" => "draft",
            ];
        });
    }
In the code above we’ve created two state functions. One for published status and one for draft status. To use these we can now call a published() or draft() method on our factory, like this:
\App\Models\Post::factory()->draft()->make();
= App\Models\Post {#5862
    user_id: 32,
    title: "Laboriosam aut est at ex rem.",
    status: "draft",
  }
In this example we called the draft state method on factory to create a post with a status of draft. We could just as easily have called the publish method (\App\Models\Post::factory()->published()->make();) to create a post with a published status.
Source code
You really should type the source code into an editor but you can clone or download the repo at https://github.com/jsmcm/blogs.laravel.factories
John, a seasoned Freelance Full Stack Developer based in South Africa, specialises in delivering bespoke solutions tailored to your needs. With expertise in back end languages and frameworks, PHP, Laravel and Golang and Front end frame words Vue3, Nuxt3 as well as Angular, I am equipped to tackle any project, ensuring robust, scalable, and cutting-edge outcomes.
My comprehensive skill set enables me to provide exceptional freelance services both remotely and in person. Whether you’re seeking to develop an innovative application or require meticulous refinement of existing systems, I am dedicated to elevating your digital presence through unparalleled technical prowess and strategic development methodologies. Let’s connect to transform your vision into reality.